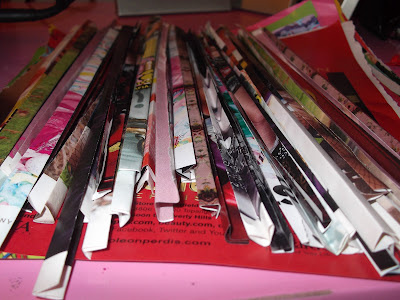
It's quite time consuming but if you're looking for something to spend a rainy afternoon doing (or if you don't sleep at normal hours like myself) this is a great project. It's probably best if you have a good television series playing or a movie, great music will work just as well!
Supplies
- Magazines
- Mod Podge (I used a DIY version of a half and half mix of white school glue and water)
- Small paint brush for applying glue (you can use your fingers if you really want to get messy, because your fingers are going to get sticky anyways!)
- The first step is to go through that magazine collection of yours. I have a cardboard box in my room full of them just waiting to be cut up for collages and projects such as this! The more colorful the page is, the better! I found going through pages of my Nylon magazines worked great because they have so many color ads and photo-spreads. You're going to want a decent amount of pages, so rip out all of your favorites (don't worry if you don't end up using any pages, you can put them away for the next time!)
- Now to cut the magazine pages into strips. A width of an inch or a inch and a half is perfect! To make this easier cut through a pile of 10 or so pages at once!
- Once you have all your strips cut it's time to get folding. Fold your strip in half, then unfold (we're just doing this to find the center of each strip). Fold each edge of the strip over towards the center point of the strip, then fold it again!
- Time to get messy now! With your water/glue mixture use your brush (or fingers) to cover your magazine strip. Once it's fully covered start rolling it up! Now repeat with your next strip, and keep repeating until they are the size you want. (I made mine smaller, to fit a glass or bottle, but it just takes a few extra strips to bring it up to mug size, or go crazy and make placemats!)
- Once your magazine strips are all coiled up to the right size apply a few more layers of your glue/water mixture to make everything a bit more solid. They are pretty wet and sticky once you get to this point, so they will take time to dry. I left mine dry overnight and they were fine by morning. When mine were dried I covered them in some clear nailpolish to ensure they would be water proof, this part is optional.


Thanks for the idea! I LOVE it! Just in time for Mothers Day coming up, too. Good pictures and directions. :D
ReplyDelete